Kiro Chat Complete Documentation
Overview
Kiro offers a comprehensive chat panel where you can interact with your code through natural language conversations. This powerful AI assistant maintains complete context of your project and enables you to ask questions about your codebase, request explanations for complex logic, generate new features, debug tricky issues, and automate repetitive tasks.
Getting Started
Accessing Chat
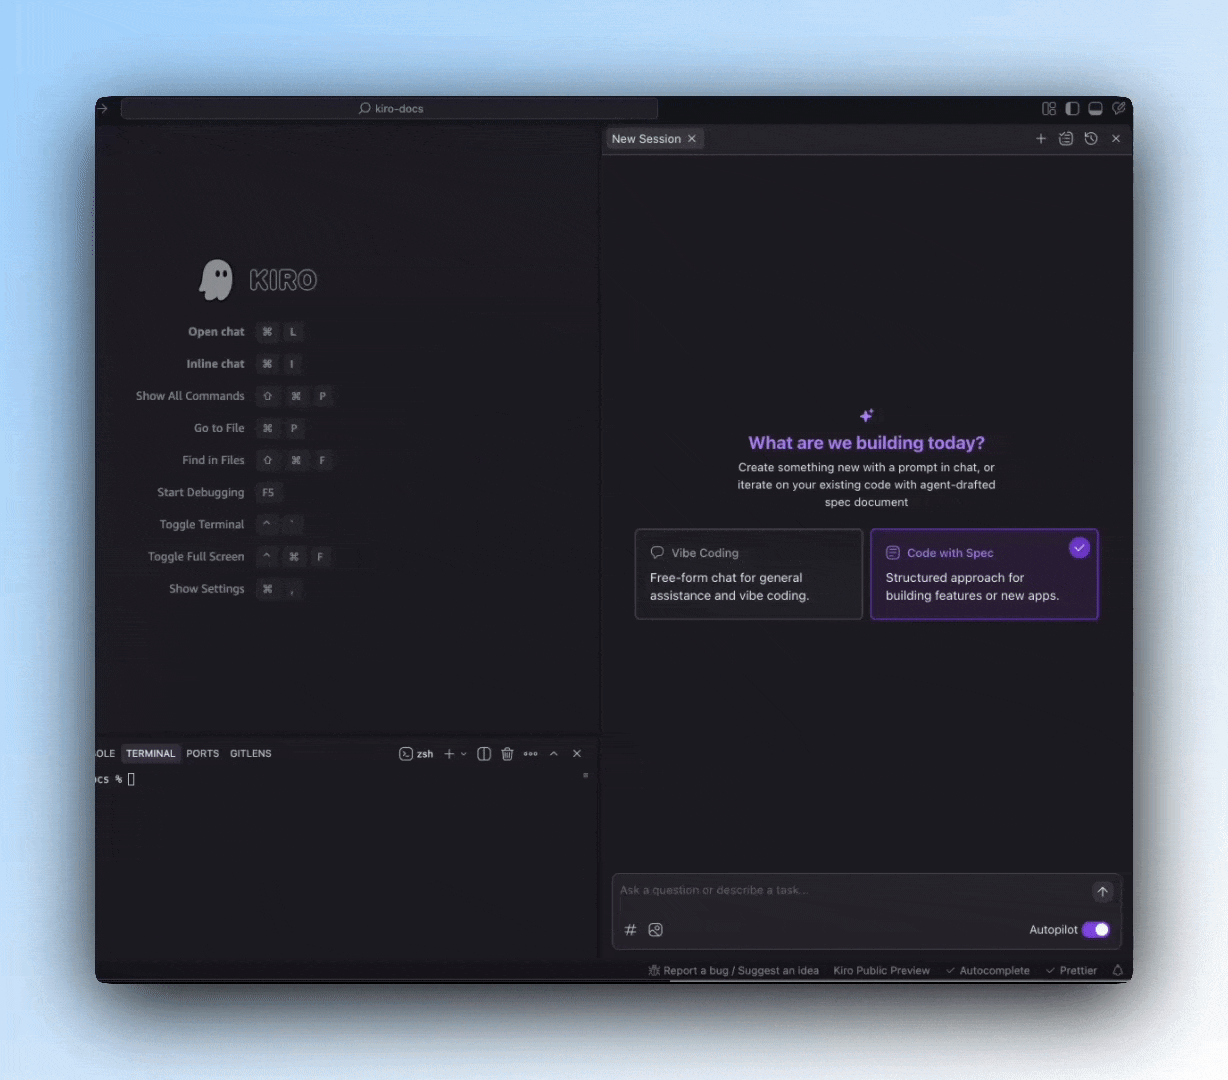
There are multiple ways to access the chat in your development environment:
- Keyboard Shortcut: Press
Cmd+L(Mac) orCtrl+L(Windows/Linux) to open the chat panel - Command Palette: Press
Cmd+Shift+P(Mac) orCtrl+Shift+P(Windows/Linux) and search for"Kiro: Open Chat" - Secondary Side Bar: Click the Kiro chat icon toggle using
Cmd+Opt+B(Mac) orCtrl+Alt+Bin the top bar on the right to open the chat panel
Your First Conversation
Once the chat panel is open:
- Type your question or request in natural language in the chat input
- Press Enter to send your message
- Kiro will analyze your request and respond appropriately
Example requests to get started:
Ask about your code
- "How does this authentication system work?"
- "What's the purpose of this function?"
Generate new code
- "Create a React component for user profiles"
- "Add error handling to this API call"
Fix issues
- "Fix the bug in the payment processing"
- "Optimize this slow database query"
Smart Intent Detection
Kiro intelligently analyzes your messages to understand whether you want information or action. When you ask questions like "How does this work?" or "What's the purpose of this code?", Kiro recognizes this as an information request and responds with explanations and documentation without modifying your code. When you use directives like "Create a component" or "Fix this bug", Kiro identifies this as an action request and will propose or implement the necessary code changes, execute commands, or manage files accordingly. This seamless intent recognition allows for natural conversation without requiring explicit commands to switch between information and action modes.
Context Management
Kiro's power comes from its deep understanding of your codebase context. It automatically analyzes open files in the editor, including their dependencies and structure, but you can also explicitly provide additional context.
Context Providers
Use the # symbol in the chat input to access context providers:
| Provider | Description | Example |
|---|---|---|
#codebase | Allow Kiro to automatically find relevant files across your project | #codebase explain the authentication flow |
#file | Reference specific files in your codebase | #auth.ts explain this implementation |
#folder | Reference a specific folder and its contents | #components/ what components do we have? |
#git diff | Reference the current Git changes | #git diff explain what changed in this PR |
#terminal | Include terminal output in the context | #terminal help me fix this build error |
#problems | Include all problems in the current file | #problems help me resolve these issues |
#url | Include web documentation | #url:https://docs.example.com/api explain this API |
#code | Include specific code snippets in the context | #code:const sum = (a, b) => a + b; explain this function |
#repository | Include a map of your repository structure | #repository how is this project organized? |
#current | Reference the currently active file in the editor | #current explain this component |
#steering | Include specific steering files for guidance | #steering:coding-standards.md review my code |
#docs | Reference documentation files and content | #docs:api-reference.md explain this API endpoint |
#mcp | Access Model Context Protocol tools and services | #mcp:aws-docs how do I configure S3 buckets? |
You can combine multiple context providers in a single request for comprehensive analysis.
Sessions and History
Kiro maintains conversation history within sessions, allowing for continuous context-aware interactions.
Managing Sessions
- Create New Sessions: Start fresh conversations for different topics or projects. Click on
+icon in the chat panel to start a new session - Switch between Sessions: Easily navigate between ongoing conversations through the tab switcher
- View History: Access previous interactions and their outcomes through the
Historybutton - Task Tracking: Monitor the progress of ongoing and completed tasks through the
Task listbutton
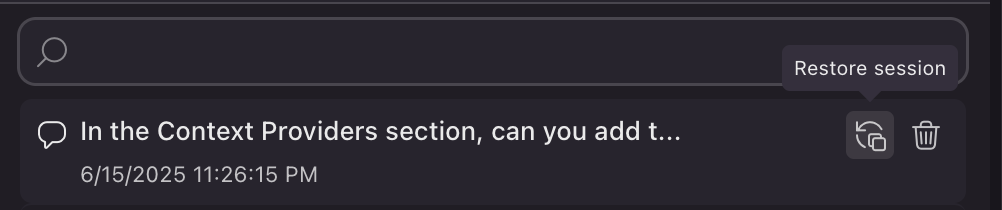
Execution History
Kiro maintains a detailed history of sessions that includes actions taken such as code changes, commands executed, search results, file operations, and more. You can search, restore, or delete a specific session.
Autopilot Mode
What is Autopilot Mode?
Autopilot mode is Kiro's autonomous execution mode that allows the agent to make code changes across your codebase and complete complex tasks with minimal intervention. It's a key feature that enables Kiro to work more independently on your behalf.
How It Works
Autopilot Mode (Default)
Kiro works autonomously to complete tasks end-to-end. It can create files, modify code across multiple locations, run commands, and make architectural decisions without asking for approval at each step. You maintain control through the ability to view all changes, revert everything, or interrupt execution at any time.
Supervised Mode
Kiro presents each proposed action and waits for your approval before proceeding. You'll see exactly what changes Kiro wants to make and can accept, reject, or modify them. This mode breaks complex tasks into manageable steps with clear checkpoints for feedback.
Switching Between Modes
You can toggle between Autopilot and Supervised modes at any time using the autopilot switch in the chat interface. This flexibility allows you to use the appropriate level of control for different tasks.
When to Use Each Mode
Autopilot Mode is best for:
- Experienced users familiar with Kiro's capabilities
- Repetitive or well-defined tasks
- Projects where you want to move quickly
- Tasks spanning multiple files or requiring several steps
Supervised Mode is best for:
- New users getting familiar with Kiro
- Critical or sensitive codebases
- Learning how Kiro approaches problems
- When you want to carefully review each change
- Working with unfamiliar code or complex systems
Kiro's Change Management Features
In Autopilot Mode
In Autopilot mode, Kiro works autonomously and can make multiple changes to your codebase without requiring approval for each individual action. However, you still maintain control over these changes through several key features:
View All Changes
- You can see a comprehensive list of all modifications made by selecting the "View all changes" option in the Chat module
- This gives you visibility into everything Kiro has done across your codebase
- Changes are presented in a diff view that clearly shows what was added, modified, or removed
Revert All Changes
- If you're not satisfied with the changes Kiro has made, you can select "Revert"
- This will restore your files to their previous state in the filesystem locally
- This is essentially an "undo" function for all of Kiro's modifications
Interrupt Execution
- You can interrupt Autopilot mid-execution to regain manual control
- This stops Kiro from making further changes if you notice something going wrong
In Supervised Mode
In Supervised mode, Kiro works interactively with you and requires your approval before making changes:
Review Changes
- Kiro shows you a diff of all proposed changes before implementing them
- You can review these changes in detail to ensure they meet your requirements
Accept All
- The "Accept All" functionality would allow you to approve all proposed changes at once
- This is useful when Kiro suggests multiple related changes that you want to implement together
Reject All
- Similarly, "Reject All" would allow you to decline all proposed changes
- This is helpful when Kiro's suggestions don't align with your intentions
Vibe vs Spec Sessions
What is a Vibe Session?
Vibe sessions are interactive Q&A-focused sessions in Kiro that are designed for quick questions, explanations, and building projects through a more conversational approach.
How to Access
You can switch between Vibe sessions and Spec sessions using the session picker when you launch a new session. This allows you to choose the interaction style that best suits your current task.
When to Vibe
Interactive Q&A Format: Vibe sessions are optimized for back-and-forth conversations about code, allowing you to ask questions and get immediate responses.
Quick Assistance: They're ideal for getting quick answers to coding questions, explanations of code behavior, or understanding concepts without going through a formal specification process.
Contextual Understanding: Like other Kiro sessions, Vibe sessions leverage context providers to understand your codebase, but with a focus on explanation rather than extensive code generation.
Flexible Approach: Vibe sessions offer a more fluid, less structured approach compared to Spec sessions, making them suitable for exploratory coding and learning.
What is a Spec Session?
A Spec session guides you through a structured approach to complex development tasks in Kiro that formalizes the software development process. It transforms high-level ideas into detailed implementation plans with systematic execution and clear tracking.
How to Access
You can switch between Spec sessions and Vibe sessions using the session picker when you launch a new session. For complex development tasks, Spec sessions provide the structure needed to ensure thorough implementation.
When to Spec
Complex Development Tasks: Use Spec sessions for building complex features, entire applications, or significant refactoring that requires careful planning and execution.
Structured Approach: When you need a methodical, step-by-step approach to development with clear documentation of requirements and implementation details.
Team Collaboration: For projects where multiple team members need to understand the implementation plan and track progress against specifications.
Documentation Needs: When you want to generate detailed documentation alongside your code implementation for future reference or knowledge sharing.
Terminal Integration
Overview
Transform your development workflow with Kiro's terminal integration. Instead of memorizing command syntax or switching between windows, describe what you want to accomplish and Kiro translates your requests into executable commands, maintains context across operations, and provides a secure approval system that keeps you in control while managing dependencies, navigating git workflows, or exploring your codebase.
Getting Started
Simply describe what you want to do in natural language. For example:
- "Install the project dependencies"
- "Check the git status"
- "Find all TypeScript files in the src folder"
- "Run the development server"
Kiro translates your request into the appropriate terminal command and asks for your approval before executing. You'll review the suggested command and choose to Modify, Reject, Run, or Run and Trust, then see the output directly in chat.
How It Works
When Kiro suggests a command, you have four options:
- Modify - Edit the command before running
- Reject - Cancel execution
- Run - Execute once
- Run and Trust - Execute and trust similar commands in the future
Trust Commands
For security, Kiro asks for approval before running any command. You can streamline this process by configuring which commands to trust automatically.
Trust Read-Only Commands
Automatically run safe commands like ls, cat, pwd, find, and grep without prompts.
Trusted Commands
Create a custom list of trusted commands using wildcard patterns:
npm *- Trust all npm commandsgit status- Trust only git statusnpm run *- Trust npm run with any script name
You can add commands to this list by choosing Run and Trust when prompted, or by manually configuring them in Settings → Trusted Commands. These settings can be configured at both the user level (global across all workspaces) and workspace level (specific to your current project).
Advanced Usage
Using Terminal Context
Reference recent terminal output in your conversations with #Terminal:
Kiro maintains awareness of command history and outputs, enabling:
- Error Analysis - Understanding why commands failed
- Output Interpretation - Explaining complex command results
- Follow-up Actions - Suggesting next steps based on results
Troubleshooting
For issues with terminal integration and manual setup instructions, see the Shell Integration troubleshooting guide.